首先參照 Getting Started with Linode 完成註冊程序以及基本的環境安裝設定。
前置準備
新增一般使用者並給予 sudo 權限:
adduser ghost
passwd ghost
usermod -aG wheel ghost
安裝 node.js 及 npm
由於 node.js 套件已進 EPEL repository,所以直接引入即可用 yum 安裝:
yum update
yum install epel-release
yum install nodejs
- 註:由於目前 CentOS 7.3 的套件相依性問題,須先自行手動安裝 http-parser,否則 node.js 會報錯而無法安裝 (ref: 0013669: can't install nodejs on centos7 - CentOS Bug Tracker)
rpm -ivh https://kojipkgs.fedoraproject.org//packages/http-parser/2.7.1/3.el7/x86_64/http-parser-2.7.1-3.el7.x86_64.rpm
yum install nodejs
安裝 nginx 並啟用服務:
yum install nginx
systemctl enable nginx
systemctl start nginx
安裝 MySQL/Mariadb 並啟用服務:
yum install mariadb mariadb-server
systemctl enable mariadb
設定資料庫 UTF8 參數:
vi /etc/my.cnf.d/client.cnf
在 [client] 區內加入設定值:
[client]
default-character-set=utf8
vi /etc/my.cnf.d/server.cnf
在 [mysqld] 區內加入設定值:
[mysqld]
character-set-server = utf8
init-connect="SET NAMES utf8"
設定 mysqld 的 root 密碼及一些安全調整:
systmectl start mariadb
mysql_secure_installation
若已啟用防火牆,將 http 及 https 服務加入允許規則:
systemctl start firewalld
firewall-cmd --add-service http --permanent
firewall-cmd --add-service https --permanent
firewall-cmd --reload
firewall-cmd --list-all
Ghost 安裝
安裝 ghost-cli 工具
首先以剛建立的一般使用者身份登入(或切換)以進行後續的安裝程序:
su - ghost
Ghost 在 1.0 版後提供更便利的 ghost-cli 命令列工具,除了可安裝、移除外,也可快速的下指令維護升級。
sudo npm i -g ghost-cli
安裝會須要一點時間,完成後即可使用 ghost 指令確認:
ghost version
ghost help
安裝 ghost
建立 ghost 的安裝目錄及設定權限(目錄名稱可自訂):
sudo mkdir -p /var/www/ghost
sudo chown -R ghost:ghost /var/www/ghost
cd /var/www/ghost
安裝 ghost:
ghost install
這邊一開始會有作業系統不符的警示訊息:
System checks failed with message: 'Linux version is not Ubuntu 16'
Some features of ghost-cli may not work without additional configuration
按 y 繼續即可,接下來的 mysql 偵測也會有失敗的錯誤訊息,同樣按 y 繼續。基本上依照安裝程序指示分別輸入所須的資料即可安裝完成。
blog url: [部落格網址]
MySQL Hostname: localhost
MySQL Username: root
MySQL Password: [MySQL 密碼]
Database Name: [想使用的資料庫名稱]
Setup Nginx: no
Setup Ghost MySQL User: yes
Setup Ghost System User: yes
Setup systemd: yes
Start Ghost: yes
- 註:由於 ghost-cli 目前是以
dkpg -l | grep的方式來偵測所須套件是否已安裝,故在 CentOS 上會偵測失敗並自行略過。這部份(nginx + SSL)後續再自行手動安裝設定即可:
Do you wish to set up Nginx? Yes
Nginx is not installed. Skipping Nginx setup.
Setting up Nginx [skipped]
Task ssl depends on the 'nginx' stage, which was skipped.
Setting up SSL [skipped]
這個 issue 官方應該會在後續更新版本中修正,參見: optimise how we detect that nginx is installed · Issue #282 · TryGhost/Ghost-CLI · GitHub
nginx 設定及 SSL 憑證的安裝
由於目前的 ghost-cli 版本在 CentOS 主機上的安裝過程中無法自動完成 nginx 以及 SSL 憑證的安裝設定,所以必須自行手動安裝及設定。
SSL 憑證安裝
安裝 Let's encrypt 自動化安裝工具,可以快速取得免費的 SSL 憑證供網站使用:
sudo yum install certbot
執行 certbot 以取得 Let's encrypt 核發的 SSL 憑證(將網域名稱及 email 置換為實際名稱):
certbot certonly -d bookishcow.net -d www.bookishcow.net --email webmaster@mail.com --agree-tos --standalone
依指示完成安裝後,私鑰及憑證會下載到 /etc/letsencrypt/live/[剛剛申請的網域名稱] 目錄下。
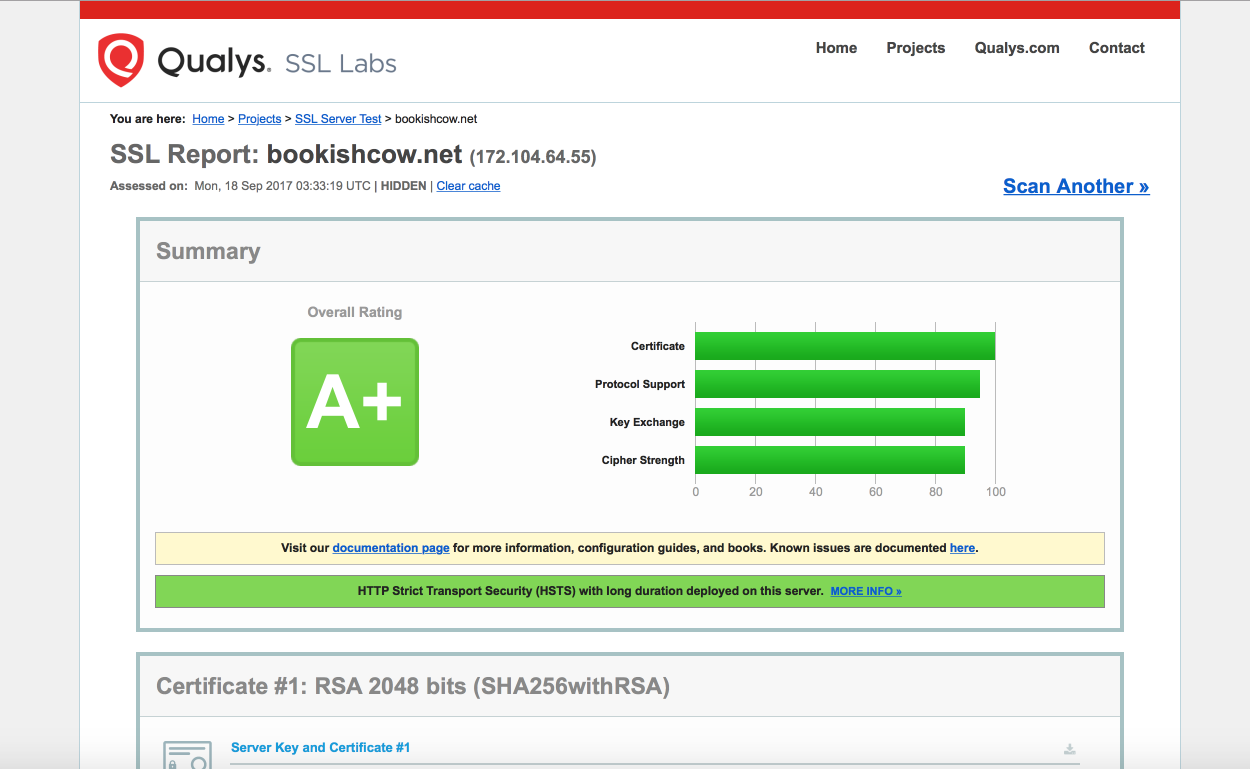
由於預設的 Diffie-Hellman parameters 會被 SSL Server Test (Powered by Qualys SSL Labs) 判定為 weak,導致評等降級為 B,可以自行產生新的加強 dhparam.pem 檔供 nginx 使用:
sudo openssl dhparam -out /etc/ssl/certs/dhparam.pem 2048
nginx 設定
修改預設的 nginx 設定:
sudo vi /etc/nginx/nginx.conf
將預設的 server 設定區段 mark 掉:
##    server {
##        listen       80 default_server;
##        listen       [::]:80 default_server;
##        server_name  _;
##        root         /usr/share/nginx/html;
##
        # Load configuration files for the default server block.
##        include /etc/nginx/default.d/*.conf;
##
##        location / {
##        }
##
##        error_page 404 /404.html;
##            location = /40x.html {
##        }
##
##        error_page 500 502 503 504 /50x.html;
##            location = /50x.html {
##        }
##    }
並在 type-hash_max_size 下新增一行加大上傳檔案大小的設定。nginx 預設值是 1MB,若不放大,之後可能在上傳圖片或佈景檔案時會導致失敗:
types_hash_max_size 2048;
client_max_body_size 10m;
新增網站的設定檔,server_name 則修改為實際的網域名稱:
sudo vi /etc/nginx/conf.d/ghost.conf
設定檔內容如下:
server {
    listen 80;
    listen [::]:80;
    listen 443 ssl http2;
    listen [::]:443 ssl http2;
    server_name bookishcow.net www.bookishcow.net;

    ssl_dhparam /etc/ssl/certs/dhparam.pem;
    ssl_certificate /etc/letsencrypt/live/bookishcow.net/fullchain.pem;
    ssl_certificate_key /etc/letsencrypt/live/bookishcow.net/privkey.pem;
    ssl_protocols TLSv1 TLSv1.1 TLSv1.2;

    # From https://cipherli.st/
    ##ssl_protocols TLSv1.2;
    ssl_prefer_server_ciphers on;
    ssl_ciphers "EECDH+AESGCM:EDH+AESGCM:AES256+EECDH:AES256+EDH";
    ssl_ecdh_curve secp384r1; # Requires nginx >= 1.1.0
    ssl_session_cache shared:SSL:10m;
    ssl_session_tickets off; # Requires nginx >= 1.5.9
    ssl_stapling on; # Requires nginx >= 1.3.7
    ssl_stapling_verify on; # Requires nginx => 1.3.7
    resolver 8.8.8.8 8.8.4.4 valid=300s;
    resolver_timeout 5s;
    add_header Strict-Transport-Security "max-age=63072000; includeSubDomains; preload";
    add_header X-Frame-Options DENY;
    add_header X-Content-Type-Options nosniff;

    location / {
        proxy_set_header X-Forwarded-For $proxy_add_x_forwarded_for;
        proxy_set_header Host $http_host;
        proxy_set_header X-Forwarded-Proto $scheme;
        proxy_pass http://127.0.0.1:2368;
    }
}
檢查設定檔是否無誤並重啟服務:
sudo nginx -t
sudo systemctl restart nginx
若以上安裝無誤,將可正常瀏覽新架設的網站。安裝完成後也應立即前往後端管理介面 https://[實際網址]/ghost,並依照畫面指示建立管理者及登入。
可參考預設的幾篇文章了解 Ghost 的操作及設定。其實 Ghost 的設計哲學與操作介面已經相當直覺簡明,並沒有過多的繁複功能,就是「書寫」,這也是我看上以及想換用 Ghost 的原因。更多的心得或教學資訊也可上網搜尋或參考這裡:Ghost for Beginners。
另外,依照上述的修正及設定,SSL 憑證也可在 SSL Server Test (Powered by Qualys SSL Labs) 正常通過測試並取得最高的 A+ 級評等。
維護
服務操作
ghost-cli 在安裝時會自動建立一個 ghost 的 systemd service,可以透過下列指令查詢服務名稱:
ls /etc/systemd/system/ghost*
例如我的 service 名稱為:
/etc/systemd/system/ghost_bookishcow-net.service
日後若須停止或重啟則可透過 systemctl 方式執行:
systemctl [start/stop/restart] ghost_bookishcow-net.service
自動更新 SSL 憑證
Let's encrypt 核發的憑證有效期為 90 天,到期後可再執行 cerbot 線上更新憑證,故此可建立一個排程來執行自動更新:
sudo crontab -e
加入工作排程:
15 4 * * 1 /usr/bin/certbot renew >> /var/log/renew-certs.log
18 4 * * 1 /usr/bin/systemctl reload nginx
此處是設定每星期一凌晨 4:15 自動執行 certbot 檢查憑證,若是一個月內即將到期則會自動線上更上憑證(renew certificates),並在 3 分鐘後重啟 nginx。
參考資料:
- Getting Started with Linode
- Ghost Docs
- How to install Ghost with Nginx on CentOS 7
- How to Deploy Ghost on CentOS 7.3 - Vultr.com
- How to Deploy Ghost v0.11 LTS on CentOS 7.3 - Vultr.com
- Using Let's Encrypt for NGINX on CentOS 7 · Siyuan's Blog
- Cipherli.st - Strong Ciphers for Apache, nginx and Lighttpd
- How To Secure Nginx with Let's Encrypt on CentOS 7 | DigitalOcean
◆ Feature Image from Unsplash by Jessica Ruscello